In our never-ending quest for improvement – check out these 4 tips for taking better food photos.
4 Tips for Taking Better Food Photos
Tip #1:
Aperture is the setting on your camera that controls light and depth of field in your photos.
On your camera it is the number that starts with “f” referred to as f/stop.
This controls the size of the opening on your lens, similar to your iris when it becomes smaller to block light and larger to allow light in.
On your DSLR camera you should be able to adjust this number based on the lens you are using.
Lowering the number on your aperture allows more light into your picture with shallow depth of field.
In simple terms the lower the number the more blurred your photo will be around the edges.
The typical “sweet spot” of aperture for food photography is f/3.2.
This is a great setting to use as you are starting point and adjusting with each photo as needed.

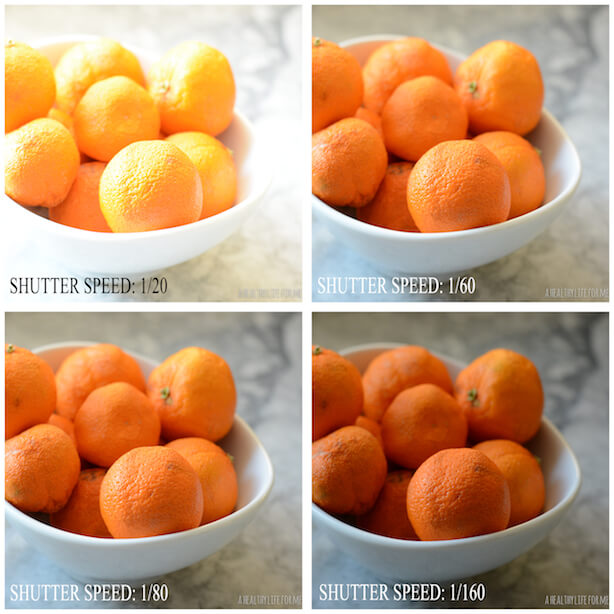
Tip #2
Shutter Speed affects the amount of light in your photo.
When you take a picture with your camera there is shutter that opens and closes as you push the button, similar to our eyelid when we blink.
Shutter speed is measured in fractions of seconds.
The less light available to you when you are shooting means you will need to adjust the camera to slow down how quickly it opens and closes it shutter, allowing in as much light as possible.
The lower your number goes the longer your shutter stays open, remember low light-low speed and high light-high speed.
When you lower your shutter speed you increase the chance of blurring your photo because of movement.
It is always best to use a tripod in these situations.
Tip #3:
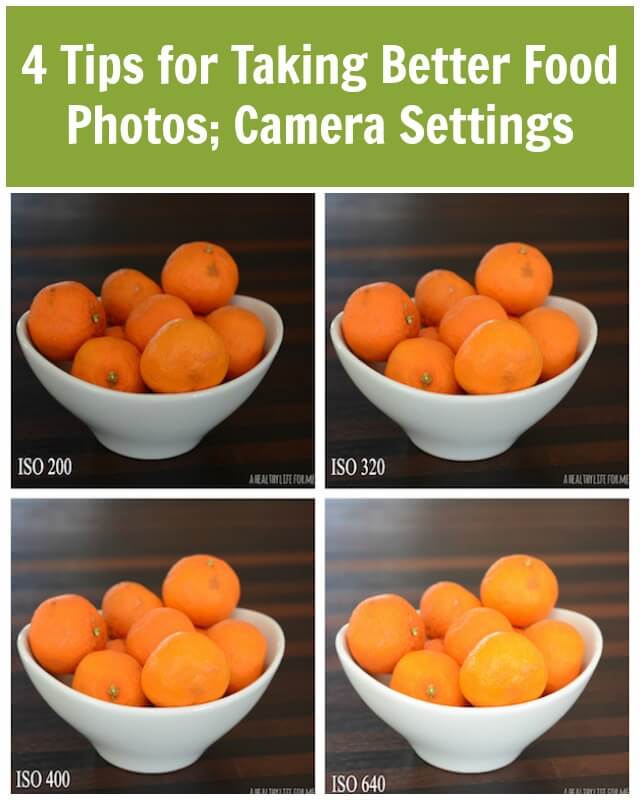
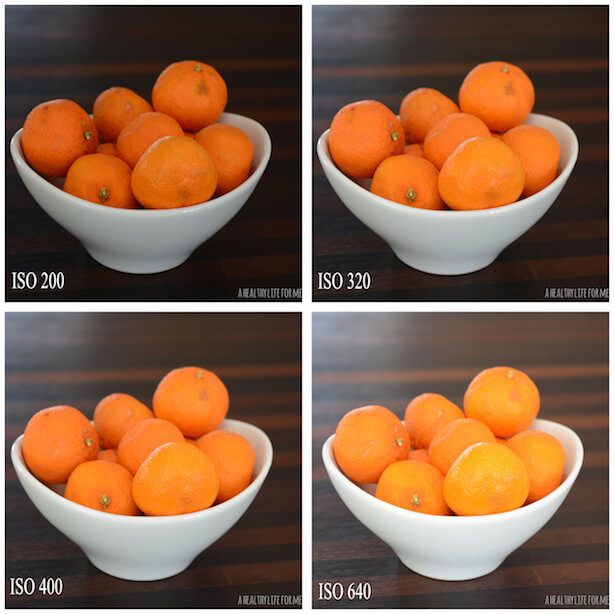
ISO, which stands for International Organization for Standardization, is how you control your camera’s sensitivity to light.
Because the color is so important in food photography try to set your ISO to its lowest setting without compromising your shot.
Having a low ISO becomes more difficult with low light.
Try and keep your ISO between 200-400.
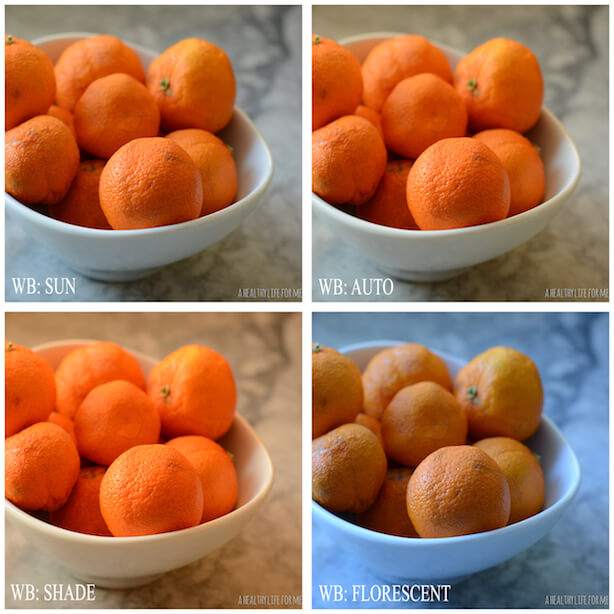
Tip #4
White Balance is the easiest setting to use on your camera to adjust.
White Balance is the color of an object as it is affected by the lighting conditions under which it is viewed.
Most cameras today do a great job of picking the white balance for you under the auto setting, and in fact most photographers admit to leaving the setting in Auto.
However, as you become more advanced in your photography and you find yourself taking pictures outside of your home, you should know how to adjust.
You should find your settings for white balance under the menu button or settings button on your camera.
Once you find it scroll through and play with the different settings seeing the difference it makes in your photos.